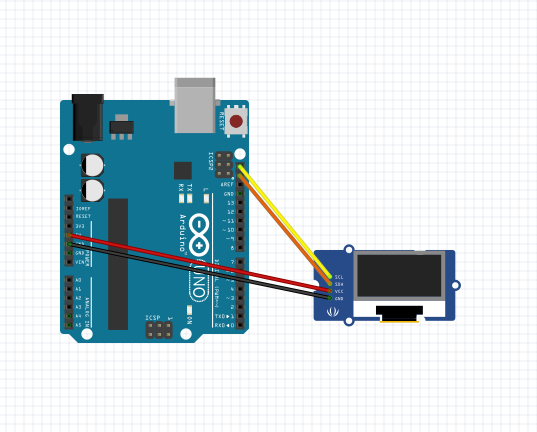
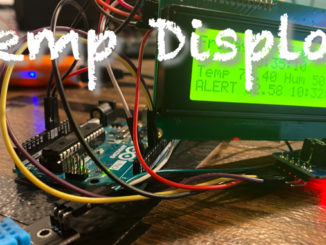
This project allows you to use an Arduino Uno with WiFi to scan for wireless networks and print out the results on a 20×4 I2C display.
Prerequisite Classes:
Links:
- New Liquid Crystal Library – https://bitbucket.org/fmalpartida/new-liquidcrystal/wiki/Home
- Liquid Crystal I2C Library – https://www.arduinolibraries.info/libraries/liquid-crystal-i2-c
Functional Parts in the Project:
- Arduino WiFi Rev 2 – https://store.arduino.cc/usa/arduino-uno-wifi-rev2
- 20 x 4 I2C LCD Screen – https://amzn.to/2JVuKzn
- 560 Piece Jumper Wire Kit – https://amzn.to/2MsCLjL

#include <SPI.h>
#include <WiFiNINA.h>
#include <Wire.h>
#include <LCD.h>
#include <LiquidCrystal_I2C.h>

LiquidCrystal_I2C lcd(0x27, 2, 1, 0, 4, 5, 6, 7);

String networkName;

void setup() {
  Serial.begin(9600);

  lcd.begin(20, 4);
  lcd.setBacklightPin(3, POSITIVE);
  lcd.setBacklight(HIGH);
  lcd.setCursor(0, 0);
  lcd.print("Network Scanner");
  lcd.setCursor(0, 1);
  lcd.print("by");
  lcd.setCursor(0, 2);
  lcd.print("Eli the Computer Guy");
  lcd.setCursor(0, 3);
  lcd.print("Built May, 2020");
}

void loop() {
  Serial.println("Scanning available networks...");

  int numSsid = WiFi.scanNetworks();
  if (numSsid == -1) {
    Serial.println("Couldn't get a wifi connection");
    while (true);
  }

  Serial.print("number of available networks:");
  Serial.println(numSsid);

  lcd.clear();

  for (int thisNet = 0; thisNet < numSsid; thisNet++) {
    Serial.print(thisNet);
    Serial.print(". ");
    Serial.print(WiFi.SSID(thisNet));
    Serial.print("\t");
    Serial.println(WiFi.RSSI(thisNet));

    lcd.setCursor(0, 0);
    lcd.print("Network Scanner");

    lcd.setCursor(0, 1);
    lcd.print("Networks Found: ");
    lcd.print(numSsid);

    lcd.setCursor(0, 2);
    lcd.print("SSID #");
    lcd.setCursor(6, 2);
    lcd.print(thisNet + 1);

    networkName = WiFi.SSID(thisNet);
    networkName.remove(16);
    lcd.setCursor(0, 3);
    lcd.print("                    ");
    lcd.setCursor(0, 3);
    lcd.print(networkName);
    lcd.setCursor(17, 3);
    lcd.print(WiFi.RSSI(thisNet));

    delay(2000);
  }
}

Be the first to comment